Thursday, December 17, 2015

Replacing a Roof? Here are some things to consider!

Replacing the roof: Many people do it only once, if at all, in their tenure as the owner of a home. For that reason alone—simply because it’s unfamiliar—re-roofing can be a daunting prospect. Aside from the stress of hiring a contractor, there are new terms to learn and tough decisions to make. Then, of course, there’s the financial dimension: A major home improvement job, roof replacement typically costs thousands of dollars, enough to make any budget-conscious homeowner hesitate. When you dig a little deeper, though, you begin to understand that replacing the roof doesn’t just take money out of your pocket; the upgrade often adds considerable value to the home. Upon resale, owners typically recoup more than half of the amount they invest in a new roof.  Still, anxiety comes with the territory whenever you undertake a high-price-tag project, even if the component at issue serves a vital purpose in safeguarding the integrity of your home.

Certainly, more glamorous home improvement projects exist, but there may be none more essential than securing a sturdy, impervious roof. Besides keeping out the weather and preventing water damage, a sound roof offers a suite of less obvious benefits, including but not limited to improved energy efficiency and curb appeal. It’s a “functional upgrade.”. Simply put, a newly roofed house performs better, generally speaking. The variable here is that hiring and working with a reliable contractor are key to success. Everyone has heard horror stories of amateurish crews doing a slapdash job (or not even completing the work). You can avoid such terrors by asking a series of simple questions at the outset of your relationship with a given pro. Unless you are an ambitious do-it-yourselfer handling it all on your own, the quality of your new roof largely depends on the people you entrust with the task at hand. So, before spending a penny, make it your business to find out the details of how contractors conduct their business. In your interviews, be sure to hit the following topics.

1. BUDGET
Installing a New Roof - Budgeting
 
Is the estimate comprehensive? It’s one thing to invest thousands in a new roof. It’s another to shell out much more than you were prepared to spend. Do yourself the favor of reviewing estimates in full, rather than skipping to the section that specifies the project total. Keep an eye out for anomalies, but just as important is to walk away if you encounter an estimate that doesn’t seem complete. Give seriously consideration only to written estimates that factor in all costs, from the permits and inspections on down to the fasteners and flashings. In addition, look for allowances made to cover miscellaneous unexpected expenses, such as the repair of the plywood sheathing beneath the shingles. Everyone knows the old adage, “If it sounds too good to be true, it probably is.” That wisdom certainly applies to estimates, but equally suspicious is any contractor who isn’t willing to explain an estimate in depth.

2. MATERIALS
Installing a New Roof - Asphalt Detail
 
What materials are going to be used? You get what you pay for. While that’s true in virtually every home improvement project, it’s never truer than in roofing. Often, when a roof fails prematurely, sub-standard shingles are to blame. Cutting corners simply doesn’t work. In fact, you’re likely to spend more over the long term if you try to scrimp at first. Explain your quality concerns to the contractors on your radar, and in turn, expect each to offer insight into your options. Before work begins, get a materials specification in writing. Then later, once the materials have arrived, double-check that they match what was agreed. In general, be wary of any contractor who does not recommend the best. Re-roofing can be as much about aesthetics as it is about performance, if you have the help you need to make the right choices.

3. INSTALLATION
What methods does the installer plan to employ? To save you money in the short term, some contractors may suggest applying new shingles directly over the existing layer. Cutting a step out of the process may be enticing, but there are compelling, legitimate reasons to pursue the correct order of operations. Basically, shingles are more secure when fastened directly to the roof deck. In addition, removing the existing roof materials brings about the valuable opportunity to inspect the roof deck. Ignore the opportunity, and it may only be a matter of time before currently concealed issues make themselves known in the form of extensive, expensive water damage. That’s why, in every re-roofing job it undertakes, Sears Home Services strips away the old shingles to reveal the underlying sheathing and, if necessary, repair it. Before applying the new shingles, installers add an ice-and-water shield to protect against ice dam damage. Along the way, important accommodations are made for adequate attic ventilation. The wise course is to hire a contractor eager to do not the easiest thing, but what’s best for your home.

4. LIABILITY
What happens if something goes wrong? When the average homeowner hires out a roof replacement job, he or she does so on the assumption that final responsibility for the project now falls to the professional. The harsh reality is that, while most provinces and municipalities place reasonably strict requirements on contractors, not everyone in the industry follows the letter of the law. That means it’s in your best interest to confirm that your contractor has bonding and insurance certification, in addition to the relevant licenses. One virtue of choosing a larger, firmly established company is that in addition to foremen and workers, there are team members focused not on the construction work, but on the paperwork. That way, you can enter into the project with peace of mind, fully confident that you’d be protected in a worst-case scenario. Most small, local contractors are licensed, insured, and bonded, but before hiring one, triple-check that you wouldn’t be liable for any accidents.

5. WARRANTIES
Installing a New Roof - WarrantiesHow long can the new roof be expected to last? Typically, asphalt shingle roofs last for about 15 to 18 years in our climate.  There are, however, different grades of shingles. For instance, the Owens Corning shingles come with a guarantee of problem-free performance for a full 50 years. Of course, if the shingles were improperly installed, even a generous product guarantee would be of little help to the homeowner.

Very few local contractors offer warranties on their workmanship. Hire well, and you can expect your chosen roofer to get the job done on time and on budget.

Other home improvements are purely elective, but roof replacement is something different. It’s not so much a choice as it is an essential step forward in defending the structural integrity of your home, while giving a tremendous boost to its resale value. Don’t just flip open the yellow pages and settle on the first company listed. Instead, do your due diligence, ask good questions, and devote thought, care, and attention to your section of whom you trust to put a roof over your head.
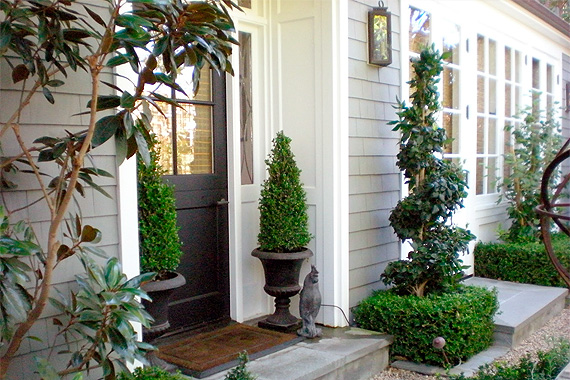
Friday, December 11, 2015

New Mortgage Rules Could Dramatically Affect Your Home Sale or Purchase in 2016


Changes to the amount of downpayment required for homes purchased over $500,000 were announced today.
 
Effective Feb 15, 2016,   down payment requirements for the purchase of a home will increase to 10% for the amount over 500K.  Up from the minimum of 5% formerly required

As an example a home sold for $700K  will require a minimum down payment of 5% on the first 500K  ( for a total of $25,000.00) and 10% on the remaining balance of $200K ( an additional $20,000.00) for a total minimum down payment of $45,000.00.   Today and up until the 15th of February, 2016, the down payment is $35,000.00 (the old requirement of 5%).

I fully expect that institutional lenders and banks may get a jump start on this process and they may change their minimum requirements earlier.
 
Contact me today for up-to-date market information or a free Home Value Report.

Saturday, December 5, 2015

HOME SALES UP NEARLY 10% IN NOVEMBER IN WATERLOO REGION!

 
Homes sales through the Multiple Listing System (MLS®) of the Kitchener-Waterloo Association of REALTORS® (KWAR) in November were up 9.8% compared to November of last year.

A total of 413 residential properties sold last month compared to 376 in November 2014. Residential sales in November included 254 single detached homes (up 10.0% from last November), 22 semi-detached (down 31.2%), 33 townhomes (down 15.4%) and 99 condominium units (up 37.5%).

2015 is just about wrapping up and we’ve had an incredible year for home sales in the Region. With the CMHC forecasting steady mortgage rates and stronger employment in the Region into 2016 we look forward to continued demand for housing in Waterloo Region.

Single detached homes in November sold for an average price of $412,581 an increase of 8.2% compared to last year. The average sale price for a condominium was $225,341, an increase of 7.3%, while townhomes and semis sold for an average of $313,015 (up 13.8%) and $257,955 (down 1.9%) respectively. The average sale price of all residential sales through the KWAR’s MLS® System increased 6.7% to $350,703 compared to November 2014.

Waterloo Region remains an affordable place to buy a home in comparison to our neighbours in the GTA, REATLORS® in this Region advocated passionately on behalf of homeowners to bring a stop to the proposed Municipal Land Transfer Tax (MLTT) in order to keep the dream of homeownership affordable for everyone in the Region. We were very pleased that the Minister of Municipal Affairs and Housing confirmed earlier this week that the government will not give municipalities the ability to charge a MLTT.

Contact me today for a Free Home Value Report!

Friday, December 4, 2015

How To Remove a Popcorn (stimpled) Ceiling Finish

Ceiling with textured finish
Ceiling with textured "popcorn" finish

Textured popcorn ceilings went out of style years ago, but many older homes—and some new ones—still have them. While taking down a textured ceiling is not that difficult, it is a messy job that requires hard work and special safety precautions.

Hazards

There are two potential problems that can turn removing a textured ceiling into a DIY nightmare:
  • Asbestos: Acoustic texture manufactured before 1980 may contain asbestos and should be tested before being removed. While it doesn’t pose a health risk if left in place, removing a ceiling containing asbestos can stir up the fibers and cause them to become trapped in your lungs. More information about the dangers of Asbestos in Your Home can be found on the Environmental Protection Agency website.
  • Painted Ceiling: Another potential problem that can make removing a popcorn ceiling much more difficult is if paint has been applied over the texture. This prevents the texture from absorbing water, which is necessary to loosen the material. While a painted textured ceiling can be removed, it usually requires the application of a chemical stripper to breakdown the paint barrier.
To determine if either of these conditions applies to your ceiling, combine a few drops of liquid dishwashing soap with warm water in a hand sprayer. Lightly spray a small spot in an inconspicuous location, and wait a few minutes for it to absorb the water. If the water will not soak in, the ceiling has been painted. Otherwise, the texture should come off easily.
Obtaining a sample of ceiling texture to test for asbestos
Obtaining a sample of ceiling texture to test for asbestos.
To test ceiling texture applied before 1980 for asbestos, use a putty knife to scrape a small amount into a sealable plastic bag. If you’re concerned about the possible health risks involved in taking the sample, a testing service can be hired to come out and take it for you.
Send the sample to an approved testing service to see if it contains asbestos. To find a testing service in your area, contact the state environmental or health office. A directory of state offices can be found on the EPA website.
If the material is found to contain over 1% asbestos then by law you can not remove it yourself and will need to contact a professional asbestos removal company or leave the ceiling as is. Even if it doesn’t contain asbestos, it’s important to wear an appropriate dust mask or respirator when removing the ceiling.

Equipment

To do the job you will need:
  • Plastic sheeting (2-3 mil for walls, 6 mil for floors)
  • Rosin paper
  • Painter’s tape
  • Rags
  • Putty knife
  • Pump up sprayer
  • Liquid dishwashing soap
  • 6” or wider floor scraper
  • Mesh sanding pad with handle
  • Drywall joint compound
  • Drywall joint tape
  • Dust mask or respirator
  • Coveralls
  • Eye protection
Electrical outlets covered with plastic
Cover electrical outlets with plastic before spraying ceiling

Preparation

Removing a textured ceiling is a messy job so good prep work is important to keep from damaging your walls or floor and to make clean up easier.
  1. Remove all furniture from the room.
  2. Turn off the heating or cooling system and close any vents. Ceiling vents should be removed and covered with plastic.
  3. Turn off the power to the room and remove any ceiling lights or paddle fans.
  4. Cover wall outlets and switches with plastic, sealing them with painter’s tape.
  5. Cover the floor with plastic, extending it a foot up the wall and attaching it with painter’s tape.
Cover floor with plastic before spraying ceiling, and secure to walls with painter's tape
Cover floor with plastic before spraying ceiling, and secure to walls with painter's tape.
  1. Run painter’s tape on the wall around the ceiling along the walls and attach the 2-3 mil plastic sheeting to it, overlapping the plastic along the bottom of the wall.
  2. To assist in clean up, cover the floor with rosin paper, overlapping the sheets and taping them together.
Running painter's tape around the walls next to the ceiling
Run painter's tape around the walls next to the ceiling, and attach plastic sheets to it.

Getting It Down

Be sure to wear a dust mask or respirator and safety glasses, and keep the part of the ceiling you are working on damp to reduce dust.
    Spraying textured ceiling with solution using a sprayer
    Spraying textured ceiling.

  1. If your ceiling wasn’t painted, fill a pump up sprayer with warm water and add 2-3 tablespoons of dishwashing soap per gallon of water.
  2. Saturate a 4-6 foot square section of the ceiling with the solution. Wet it enough to loosen it, but not so much that it damages the drywall under the texture.
  3. Wait 15-20 minutes for the solution to be absorbed by the texture material.
  4. Use a floor scraper, or other wide bladed tool, to gently scrape away the popcorn texture. Be careful not to gouge the drywall or tear the drywall joint tape.
  5. If the texture proves difficult to remove, spray it again, wait a few minutes, and try again.
  6. Use a putty knife to remove any residual material as well as to get into the corners.
Using a scraper to remove wet ceiling texture
Using a scraper to remove wet ceiling texture.

Repairs and Finishing Touches

You’ll probably need to do some drywall finishing to the ceiling after the texture has been removed, including:
  1. Hammer any visible nails or screws below the surface and cover them with joint compound.
  2. Replace any damaged drywall tape and smooth out the joints with joint compound.
  3. Once the repair work has dried, sand the ceiling with a long handled mesh sanding pad. Sand only to remove the high spots, as too much sanding will damage the ceiling.
Sanding the ceiling with a long handled, drywall sanding pad
Sanding the ceiling with a long handled, drywall sanding pad.
  1. The final touch is to prime and paint the ceiling using latex ceiling paint.

A Great Workout

Removing that dated popcorn ceiling will save a trip to the gym by giving your arms and upper body a great workout. In addition to your bulging biceps, the smooth ceiling will add value in your house and make all the hard work worthwhile.

Sunday, November 22, 2015

Mortgage Pre-Approval - one of the MOST important steps in your Home Search!

Buying a house is a very exciting time for anyone and most potential homebuyers want to jump right in and start looking at houses. However, getting pre-approved for a mortgage is one of the most crucial points in beginning your home search. It is natural to want to start looking at houses immediately, but getting pre-approved first will make the process much more streamlined for everyone involved. Here are 5 reasons why you should get pre-approved before house hunting.

Saves time for everyone.

It doesn’t make sense to look at houses when you don’t know what your price range is or whether you’ll even be approved. Looking at homes takes time and while it may be fun for you, it is also work for your real estate professional. Having a pre-approval before house hunting will allow you to look at homes that you can afford and save everyone’s precious time.

You know what your budget is.

As a homebuyer you want to begin looking at homes you can afford. There is nothing worse than falling in love with a home that is outside your price range. Getting a pre-approval before house hunting will give you a realistic expectation as to what you can afford. With that number you can decide on what compromises you are willing to make to stay within that price range. This will help you to manage your expectations and emotions during your house hunt.

You will be taken more seriously.

Having a pre-approval in hand will make you look much more on top of things during the home buying process. Many realtors won’t begin showing homes until they see your pre-approval letter and know what price range of homes they should be showing you. Additionally, when it comes time to make an offer on a house, you will be taken more seriously in the eyes of a seller if you have a pre-approval letter to present. In fact, your offer may be more attractive to others because the sellers will know that you’ve already secured a mortgage loan.

It is much less risky.

If you enter into a sales contract without a pre-approval you are creating many risks for yourself. First, getting a mortgage pre-approval may take time and it may push back your closing if you don’t already have one. Secondly, if you fail to get a pre-approval after entering into a sales contract you may end up making hasty decisions or decisions based on emotions and timelines that you may later regret. Neither are risks you want to take when buying a home.

Helps expedite the closing process.

Having a pre-approval before entering into a sales contract will make the process much more streamlined. You will already have a point of contact with your lender and will most likely have a list of documentation that you’ll need to provide. You won’t have to go through the entire underwriting process and it will help you to close on your mortgage in time.

Remember these 5 reasons of why you should get pre-approved before house hunting. It saves everyone time and will help you to avoid any heartache and headache in the real estate market.

I know some very experienced and knowledgeable Mortgage Brokers who can provide valuable advice and guidance - just contact me and I'll hook you up!

Thursday, November 19, 2015

5 Reasons "Bargain Hunting" for a Home Might Not Work

It's natural to want to save money when you're making a purchase as large as a home. You want to buy the best home in the best neighborhood at the best price, and you may think the only way to accomplish your goals is to look for bargains. So instead of hiring a real estate agent, you scour the market for FSBOs, power of sales, or homes that have been on the Internet too long.
While you're bargain-hunting, here are five things you should keep in mind:

Lowballing sellers doesn't work.
They don't waste time with low-ball offers that they find insulting. Just as you want the home you buy to appreciate in value, sellers purchased their homes as investments, too. They want to net as much as possible, because they took a financial risk and had the foresight to buy the home they chose.

This sense of entitlement -- that homes should only be sold at a profit - may cause them to overprice their homes or be less willing to negotiate. You'll feel the same way when it comes time for you to sell your home, so make your offer reasonably and respectfully. Show the comparables that led you to make the offer. Be open to compromise.

Other buyers are getting professional help.
Ninety percent of buyers use a real estate agent while you're spinning your wheels driving around neighborhoods and calling For Sale By Owners (FSBO)  sellers who aren't home to take your call. Soon, you'll notice that the homes you're watching are going under contract with other buyers.

True bargains are rare.
Sometimes a distressed home will impact the prices of the other homes because they typically sell at a discount of 17 percent, according to the National Association of Realtors. The other sellers may discount their homes somewhat, but if they're not in distress, don't expect them to negotiate as if they are.  A power of sale could take months to close and involves many risks and pitfalls. And while a typical home sale is usually dependent on the buyer firming up and deciding to finalize the agreement, power of sales are always within the control of the seller and have many scenarios which are out of the buyer's hands.

If a home has been on the market for a long time without a price reduction, there's usually a good reason. You have an unmotivated, unrealistic, or upside-down seller, any of which could waste your time without resulting in a purchase. Move on to a deal that you can actually make.

The home needs work.
Sometimes a home will be marketed "as is," which suggests that it needs a lot of work. Or, a home may be well maintained, but it's so out of date it looks like a vintage sit-com set. You could be looking at a money pit.

Are you willing to perform the work or pay someone else to do the work? Before you buy, get a home inspection and then get bids from contractors who can help you bring the home up to today's standards. If the purchase price and repairs come to approximately the same price as an updated home in the same area, then go for it.

It's not a bargain if it doesn't suit your needs.
A home is a good buy only if it suits your family's needs for space, features, comfort, and function. If you buy a home without enough bedrooms or baths, you'll pay more in transaction costs to sell the home and buy another that's more suitable. Choose wisely in the first place because it takes time to build equity. Your home should meet your needs for a long time.

Contact me today for a Free Home Value report or to chat about current market conditions!

Saturday, November 14, 2015

Curb Appeal - First Impressions DO Count!

First impressions count — not just for your friends, relatives, and the UPS guy, but for yourself. Whether it’s on an urban stoop or a Victorian front porch, your front door and the area leading up to it should extend a warm welcome to all comers — and needn’t cost a bundle.

Here’s what you can do to make welcoming happen on the cheap.


1. Clear the way for curb appeal. The path to your front door should be at least 3 feet wide so people can walk shoulder-to-shoulder, with an unobstructed view and no stumbling hazards. So get out those loppers and cut back any overhanging branches or encroaching shrubs.

2. Light the route. Landscape lighting makes it easy to get around at night. Solar-powered LED lights you can just stick in the ground, requiring no wiring, are suprisingly inexpensive. We found 8 packs for under $60 online. 
3. Go glossy. Borrow inspiration from London’s lovely row houses, whose owners assert their individuality by painting their doors in high-gloss colors. The reflective sheen of a royal blue, deep green, crimson, or whatever color you like will ensure your house stands out from the pack.

4. Pretty up the view. A door with lots of glass is a plus for letting light into the front hall — but if you also want privacy and a bit of decor, check out decorative window film. It’s removable and re-positionable, and comes in innumerable styles and motifs. Pricing depends on size and design; many available for under $30.

A way to get the look of stained glass without doing custom work or buying a whole new door: Mount a decorative panel on the inside of the door behind an existing glass insert, $92 for an Arts and Crafts-style panel 20-inches-high by 11-inches-wide.

5. Replace door hardware. While you’re at it, polish up the handle on the big front door. Or better yet, replace it with a shiny new brass lockset with a secure deadbolt. Available for about $60.

6. Please knock. Doorbells may be the norm, but a hefty knocker is a classic that will never run out of battery life, and another opportunity to express yourself (whatever your favorite animal or insect is, there’s a door-knocker in its image).

7. Ever-greenery. Boxwoods are always tidy-looking, the definition of easy upkeep. A pair on either side of the door is traditional, but a singleton is good, too. About $25 at garden centers. In colder weather, make sure pots are frost-proof (polyethylene urns and boxes mimic terracotta and wood to perfection).

8. Numbers game. Is your house number clearly visible? That’s of prime importance if you want your guests to arrive and your pizza to be hot. 
Stick-on vinyl numbers in a variety of fonts make it easy, starting at about $4 per digit.

9. Foot traffic. A hardworking mat for wiping muddy feet is a must. A thick coir mat can be had at the hardware store for less than $20. Even fancier varieties can be found well under $50.

10. Go for the glow. Fumbling for keys in the dark isn’t fun. Consider doubling up on porch lights with a pair of lanterns, one on each side of the door, for symmetry and twice the illumination. Many mounted lights are available well under $100.

11. Snail mail. Mailboxes run the gamut from kitschy roadside novelties masquerading as dogs, fish, or what-have-you to sober black lockboxes mounted alongside the front door. Whichever way you go, make sure yours is standing or hanging straight, with a secure closure, and no dings or dents. The mail carrier will thank you.


Friday, October 9, 2015

Keeping Financial Security in Mind When Purchasing a Home

Tuesday, September 29, 2015

A Guide To Helping Your Home Sell Faster

Home Sale Blog
Who doesn’t want a faster home sale? Make a good impression on buyers to increase your chances of a speedy sale. Not sure how to do that? We’ve got tips for every step of the home sale process.

Optimize Your Listing: A picture is worth a thousand words. Take professional quality images of your home. There is an abundance of online listings — do what you can to make yours stand out (for all the right reasons). My marketing plan always incorporates the use of a professional photographer.

Upgrade Your Curb Appeal: The outside of your home is the first area a potential buyer will see. Spruce up your yard and exterior. Add a fresh coat of paint, new landscaping, a new mailbox, and more!

Clear Clutter: Getting rid of clutter may make your home appear larger and more appealing to buyers. Donate usable items, and get rid of items that are unusable. Once you’ve paired down, get organized so everything looks neat and tidy.

Make Your Home Feel Larger: Little tricks like using light paint colors, incorporating mirrors, adding extra lighting, and sticking to a monochromatic color scheme may make your room appear larger. Make some home decor and home improvement changes before your open house.

Accomplish Home Improvement Projects: Pick up a hammer and nails, and complete some home upgrades. Before you get started, make sure you’re not improving something too much. It’s not an oxymoron, we promise.

Avoid Common Seller Slip-Ups: Learn from someone else’s mistakes.  Home condition, marketing, and open house times all made the list.

Ace Your Open Houses: An open house is a key component of the home sale process. You want your open houses to run as smoothly as possible.  Make sure they're marketed properly and show their absolute best!

Set the Price: Setting a price can be tricky. You don’t want to price too high or too low. It’s helpful to research, listen, and compromise.

What are you waiting for? Start today. You may find that you have a smoother (and speedier) home sale process as a result.

Contact me today for a free Home Value Report!

Saturday, September 26, 2015

Keep the Positive and Negative Features of Your Home in Mind When Staging

Every room has positive and negative features; it’s what you do with those features that can make a buyer excited about your space. In any room of the house there should be a dramatic focal point that attracts your eye, but is that focal point pleasing to the eye? Does it have a positive connotation or a negative one?

Here’s a list of some positive features you may have in your home:

Positive Features
  • Large Front Yard
  • Landscaping/Sprinkler Systems
  • Two-Car Garage
  • Deck/Patio
  • Swimming Pool
  • Outdoor Living Area
  • Outdoor View
  • Energy-Efficient Windows/Insulation/Appliances
  • Picture Windows/Sliding or French Doors
  • Grand Foyer
  • Wood Floors
  • Built-in Shelving
  • Fireplace
  • Hi-Hat Lighting/Fans/Chandeliers
  • Lots of Storage Space/Closets
  • Kitchen with Island
  • Home Office
  • Master Suite with Spa-Like Bathroom
  • Large Rooms
  • Family Room or Additional Great Room
  • Open Layout
  • Finished Basement
These are just a few of the positive features buyers look for in a new home. If you have these types of features in your home, guess what? You’re one step closer to the closing table because you already own what buyers are looking for. Now you just have to make sure they notice those features.
Here’s a list of some negative features, or basically anything that is an eyesore, a needed repair, or an imperfection you can’t change.

Negative Features
  • Location of Home
  • Uninviting Curb Appeal
  • No Garage
  • Unappealing or No Landscape
  • Peeling Exterior Paint/Bad Paint Colors
  • Old Roof
  • Old Windows/Doors
  • Small or Awkward Layout
  • Carpeting
  • Outdated Kitchen and Bathrooms
  • Small Bedrooms
  • Limited Ceiling Lighting
  • Structural Problems
  • Electrical/Plumbing Problems
Some of these negative features can have a real impact on whether the buyer makes an offer or not, and if an offer is made how much will they take off the sales price to budget in improving these features? Some features are just out of your control; for instance, the location of your home is impossible to change.

So, in order to make sure these positive features get noticed, we have to downplay the negative aspects of the space. Stylish Stagers staged a co-op apartment in Kew Gardens that is a great example of this. The space was average; nothing really grabbed the buyer’s attention. And while the apartment was large, the seller’s belongings were scattered everywhere. This picture was their living room before we staged the space. What attracts your eye? Is it positive or negative?


The orange focal wall stands out and says, “look at me,” but there is nothing there to look at. While the window is large and bright, the curtains are less than attractive. The paint color also directs your eye to that door in the corner. This door had caused many headaches for the sellers because it’s a door to nowhere. They’d been on the market for a year before calling us, and the sellers said, “Every time a buyer comes in they question that door.” So we knew we’d need to come up with a solution.

Take a look at what the stagers did:


The room was painted a comfy beige, removed the window treatment, and added curtains from floor to ceiling, flanking the picture window. Then extended the fabric to cover the doorway. Presto, the door to nowhere is now nowhere to be found. Also switched the furniture layout so that when you walked through the front door into the room you saw the couch rather than the entertainment center.

As you can see, by painting, decluttering, rearranging, and adding some modern accessories by taking a cue from mother nature,  many of the space’s positive areas of this room are
 now highlight , such as picture windows, spacious layout, and wood floors.

Tuesday, September 22, 2015

Moving Day Just Got 100x Easier With These Simple Tips & Hacks

Dread your upcoming move all you want, but it's going to happen. Make moving day less painful with this series of clever and easy tips and hacks that are simple, but will make the whole process faster and easier. And then maybe, just maybe, you won't go insane after packing your 99th box, and will enjoy the first night in your new home.

A toothpick or safety pin marks the end of packing tape, making it easier to spot the edge so you don't waste time running your finger around the roll, looking for where the tape begins.  When you finish with the tape, simply put a toothpick across near the end where you'll be peeling it back for the next box.

Put any screws or hardware in marked sealable bags, then tape the bag inside the corresponding boxes, or on the furniture itself.

Don’t bother emptying your bedroom dresser of its contents. If you cover each drawer with plastic wrap, you can move them as is without the need to unpack, then repack and organize your clothing.

Use socks as packing material to protect glasses, and extra linens for other breakable dish ware. It'll save you money on bubble wrap and is more protective than newspaper.

Cover salt & shakers, half-used shampoo bottles, or anything else in danger of leaking during the move, with more plastic wrap. Screw on the tops over the plastic wrap. Hey look, no spillage in transit!

Before you unplug and pack up all electronics, label your cords. A piece of duct tape or masking tape, with the name of the corresponding equipment written in pen, will save you from having to guess what's what when you reassemble everything in your new home.

Also, take a picture of the back of your television and/or stereo equipment, so you'll know exactly how to set it up once you get to your new home.

Pack the heaviest of your objects (like books) in suitcases with wheels. No hernias to see here, keep moving and thank you very much.

Place knives in padded potholders so no one gets cut, poked or scraped in the process of moving. (If they are really nice knives, you can wrap them individually as well so they don't damage each other.)

Having moved nearly 20 times in the last 25 years, I can honestly say I've used ALL of this tips!!!

Friday, September 18, 2015

10 Home Staging Tips to Help Sell (or Rent) Your Property FAST!

You’ve done everything you can to get your property ready for sale or rental. You’ve renovated, rehabbed, upgraded and created what you think is the perfect home for prospective buyers or renters.
But before you list it and stick that “open house” sign on the front lawn, there’s one final thing you need to do to make sure all your hard work pays off: staging.

Staging is the art of presenting your property in the most attractive and positive light possible. Done right, staging turns a property into a home and allows people to envision themselves living there.
While factors like location and number of bedrooms can get people in the door, it’s the way that the property captures their imagination that will ultimately influence whether or not they decide to sign on the dotted line.

While not replacing the knowledge and advice of a professional stager, here are 10 simple but powerful steps to stage your home successfully.

Keep it Simple

To appeal to the largest number of people possible, keep the decor understated and neutral. Cream-colored or beige furniture, linens, curtains and bedspreads are always a safe bet, although you can also evoke a mood by using certain colors in certain rooms. Bathrooms, for example, show nicely with spa-like colors like soft blues, greens and lavenders. (Imagine soft blue towels, neatly folded and stacked, next to a matching blue soap bottle and a matching toothbrush holder.)

Keep it Bright

Well-lit rooms look bigger, newer and more inviting, so let there be light whenever possible. Open up curtains and blinds to show off how much natural light each room gets, and use lamps to brighten up any dim corners.
stage-house
Related: How to Stage a House on a Budget to Sell FAST

Keep it Comfortable

Be mindful of potential buyers’ and renters’ physical comfort as they tour your property. If it’s summertime, make sure your rooms are cool. If it’s winter, keep the furnace high enough to keep out the chill and take advantage of the opportunity to show off fireplaces with a cozy fire. The more physically comfortable people are, the more likely they are to linger and take in all the great features your property has to offer.

Make it Look “Lived In”

Empty rooms don’t look more spacious; they actually look smaller because buyers have a hard time telling at a glance how much furniture the space can accommodate. They also come across as stark and uninviting. Adding a few key pieces of furniture and accessories can help people feel at home and allow them to really picture themselves living in each room.
You don’t need to fill up each room completely, just enough to create a welcoming scene. In the living room, add a couch, coffee table and some side chairs, along with accessories like an area rug (if you have hardwood floors) and complimentary curtains. In the bedroom, a bed, nightstand and dresser will do the trick. (Pro tip: Stack two mattresses on top of each other and neatly make the bed in order to avoid the hassle of moving an actual box spring into the space.)
Additional touches like fresh fruit in the kitchen and scented candles in the bathroom can up the “homey” factor. Just stay away from cheesy props like fake food and artificial flowers; people can spot them a mile away.

Highlight Each Room’s Purpose

A wasted, “catch-all” space impresses no one. If a room doesn’t have a clearly defined purpose, define one yourself based on what your target market is looking for. That spare room could become an office, extra bedroom, craft room or playroom, depending on how you stage it. Don’t force people to brainstorm ways they could use an extra space; help paint a picture for them.
If you have any odd corners or “dead spaces” in your property, you can also stage these to make them look like positive features. A random nook in the hallway could be turned into a reading area with a comfy armchair and an open book, for instance.

Know Your Market

Think about your buyers’ (specific) needs.
If you’re flipping a home in a mid-range suburb where buyers are largely families, turning that tiny spare room into a kid’s bedroom may net you great positive feedback.
If you’re renting a Class A home or luxury condo in a high-end neighborhood, turning that tiny extra bedroom into a home office or a walk-in closet complete with shelves, mirrors and a plush seating area might get you more “wow” factor than staging it as a cramped, small bedroom.

Accent Selling Points

Draw people’s eyes to the best features in your property. Painting an accent wall, placing a large plant or arranging accessories in groups of threes are all easy ways you can highlight features like fireplaces, window seats and built-in shelving.

Make Sure it “Flows”

Walk through your property as though you were touring it yourself to see if any objects interrupt the natural flow of traffic from one room to another. You may need to rearrange a piece of furniture here or there. Poor flow distracts people from your property’s great features and can also make rooms feel smaller than they really are.
Related: Home Staging 101 For House Flippers
how-to-stage-house

Create the Illusion of Extra Space

Make ceilings look higher by hanging curtains several inches above existing window frames and letting them pool to the ground. Unite a small kitchen with the adjacent living room by using a continuous color scheme that makes them feel like one cohesive space. Be mindful of the scale of furniture in each room; a few smaller pieces can make a space look larger than one or two oversized pieces.

Make Sure to Stage Outdoor Areas, Too

Don’t forget to stage any outside areas as well. Whether you’re trying to sell a single-family home with a large backyard or a condo with a small patio, use strategically chosen plants, furniture and accessories to help people see how they can use the space to relax and unwind.

Friday, September 11, 2015

Thinking of selling in the Spring? Start Preparing in the Fall!

Planning on selling your home in the spring? Good news — that leaves plenty of time to tackle all sorts of projects this fall that will help you snag top dollar when the tulips start blooming. Take an objective look around your home from a buyer’s perspective. What would stop you from making an offer? What do you need to do to put your home’s best face forward?

Here are some fall projects to jump on now in order for your home to be in tip-top shape for a spring sale:

1.  Update Your Curb Appeal
Landscapers planting in a front yard

Curb appeal is important. Make sure the bushes are all trimmed. Re-mulch or replace stone walkways and paths. Remove any dead plants and trees, and aerate your lawn so it will be lush come spring. Pressure wash the driveway, the front walk, and the exterior of your home. If need be, have the exterior of the house painted and, at the very least, apply a fresh coat of paint on the front door.


2.  Get a Home Inspection

The NATIONAL ASSOCIATION OF REALTORS® says 77% of homebuyers have an inspection done before completing a home purchase. To avoid nasty surprises once you’re in the process of selling your home, have your own inspection done and make any repairs over the winter months before you list the home. Homebuyers often use flaws and needed repairs to negotiate a lower price.

3.  Replace Flooring and Paint Walls

Determine if your carpets need replacing or just a deep, professional cleaning. If they need to go, consider if hardwood or another flooring material might be more appealing to buyers.

You’ll also want to inspect interior rooms for dirty or scuffed walls that need a fresh coat of paint. Paint the whole wall, don’t just do touch-up repair work, because it never looks as good. Also, if you have eccentric or loud wall colors, now is the perfect time to update to a more neutral palette. Stagers recommend beiges, light grays, and off-whites.

4.  Tackle the Basement, Attic, and Garage
Between the studs garage shelving

Often overlooked, these storage meccas can become a catch-all for junk. Use cool, fall weather as an excuse to get down and dirty in these hot spots and organize them from top to bottom. Install shelving, pegboards for tools, and hanging brackets for bicycles and other large sporting equipment. Your goal is to pitch the junk, sell what you no longer need, and categorize the rest.

Donate or recycle clothes and bedding you don’t use anymore in order to free up storage space in your closets, basement, and garage. These areas should look roomy, well-organized, and clean.


5.  Consult a Stager

Buyers need to picture themselves living in the house, and they may have trouble doing that if all your personal effects are on display. In order to accomplish that, a professional stager can create a plan for you that you can spend the winter months implementing. Bly spends about two hours walking through a property assessing curb appeal, interior flow, closets, bookcases, media cabinets, flooring, and more. Things like neutralizing out-of-date decor, removing old furnishings and carpeting, and updating light fixtures are recommended. Also consider the type of shower curtains, towels, bedding, and pillows to display for an upscale look.

Getting a jump on these fall projects will give you a leg up on selling in the spring. Today’s buyers are savvier than ever before, especially millennial first-time homebuyers who may have searched homes online for months prior to getting in the field. More than just listing your home in the spring, you want to make it’s as perfect as possible. That means everything works and looks immaculate, and there are no glaring issues that will turn off buyers. When you’re ready, have a friend or relative drop by for a tour and point out anything you may have overlooked.

Wednesday, September 9, 2015

8 Home Reno Projects that will immediately add value!


When it comes to home improvement, some dollars stretch more than others. And if you’re on a limited budget, it becomes even more important to spend those dollars wisely.

Here are eight affordable (under $5,000) home improvement projects that’ll help you enjoy your home more today and provide excellent financial return in the future.
 
1.  Add the Finishing Touch of Molding
Chair rail moldingImage:

Decorative molding is a classic touch that’s been around since the ancient Greeks and Romans first installed it to add grandeur to their buildings.  Centuries later, molding is still one of the most dramatic ways to dress up a room. It’s a budget-friendly improvement that trims a room for a finished and expensive look.

Today’s wood moldings come in hundreds of options — from simple to ornate — that you can stain, paint, or leave natural. You can also find moldings in flexible materials, such as foam, that make installation a whole lot easier. Some moldings even include lighting that casts a soft, ambient glow. 

Buyers consistently rank both crown molding and chair railing in their list of most desirable decorative features they seek in a home (#3 and #7 respectively), according to the annual National Association of Home Builders (NAHB) survey, “What Home Buyers Really Want.”

And at $1.50 per foot if you DIY it, or $8 per foot if you hire, it’s a no-brainer in terms of personalizing your home while adding value. (Although I don’t recommend DIY unless you’ve got above-par mitering skills.)

A few tips about molding:
  • Use crown molding to make a room seem bigger and taller. But be careful about proportions. If your ceiling height is 9 feet or less, go with simpler styles to avoid overwhelming the room.
  • Chair railing placed incorrectly can make a room seem out of proportion. Rule of thumb: Place chair railing at one-third the distance of the ceiling height.
  • Don’t forget entryways, doors, and windows: Bump up the trim around these areas to give rooms a completed and expensive feel.


2.  Install Quality Ceiling Fans
Ceiling fan in nurseryImage:

If crown molding and chair railing were #3 and #7 on buyers’ decorative wish lists, what was #1?

Ceiling fans.

Over the years, ceiling fans have become quite the crowd pleaser. Once they were just a cheap solution to rising energy costs — ugly, wobbly, noisy eyesores endured because they were cheaper than air conditioning.

Today, ceiling fans have evolved into an essential component of American homes as energy prices continue to rise. And since designs have caught up with the times, they come in a variety of styles and colors to complement any room.  If your ceiling fans are old and outdated, new ones (coupled with a fresh paint job and crown molding) could give your rooms a refreshing update while saving money.

Some tips about ceiling fans:
  • Ceiling fans should hang 7 to 8 feet above the floor. If you’ve got a low ceiling, buy a hugger ceiling fan that’s flush-mounted.
  • Size matters more than the number of fan blades. Go for the biggest Energy Star-rated fan that will fit the space.
  • Choose quality. You’ll get better cooling results, less noise, and good looks at a digestible price point of $200 to $600.
3.  Plant Some Trees
Apple tree in yardImage:

Say what? Adding trees doesn’t instantly pop into your head when you think of adding value to your home. But trees are moneymakers that get better with age.

A mature tree could be worth between $1,000 to $10,000, says the Council of Tree and Landscape Appraisers. A 16-inch silver maple could be worth $2,562, according to a formula worked out by the Purdue University Cooperative Extension Service.

In urban areas, money really does grow on trees. A recent study of home sales by the Pacific Northwest Research Station of Portland showed that street trees growing in front of or near a house boosted its sale price by an average of $8,870 and shaved two days off its time on the market.

There’s more. Trees also:
  • Save $100 to $250 annually in energy costs
  • Lower stress
  • Prevent erosion from downpours and roof runoff
  • Protect your home from wind, rain, and sun
But don’t just run out and plant trees willy-nilly. Here are some tips:
  • Follow the sun. Plant shade trees on the south side of the house where the sun beats strongest and longest.
  • Follow the wind. Plant windbreak trees, which can lower winter energy costs by 30%, on the north and northwest sides of your property.
  • Don’t plant too close. If you do, branches can scrape roofs and siding, causing expensive damage. Rule of thumb: Don’t plant trees any closer than the tree’s mature height plus one-fourth of that height. So, for example, if a tree reaches 40 feet, it should be planted at least 50 feet from any other trees.


4.  Install a Patio
Patio adds valueImage:

Patios are a great cost-effective way to increase your home’s living space without actually adding on. Plus you’ll recover 30% to 60% of your investment. A $2,000 patio would return around $900 at resale.

But don’t go crazy and trick out your patio with high-end amenities, like an outdoor kitchen — especially if you’d be the only one on the block with one. When it’s time to sell, you won’t get back much — if any — of your investment on kitchens and other high-end amenities. Instead, keep it simple and functional. (And, really, how often would you use an outdoor kitchen?)

Some wise advice when planning a patio:
  • Check property for slope, sun, and shade patterns.
  • Remember ‘dig alerts’ that utilities provide free of charge.
  • Don’t skimp on patio lighting. It can make all the difference in functionality and beautification.

5.  Pump Up Your Home Security

The peace of mind that comes with installing a home security system is priceless.

In reality, price varies. You can buy and install it yourself for $50 to $300, or a security company can sell and install a system from $0 to $1,500. The “zero” is the hook companies use to lure you into signing a multi-year monitoring contract that ranges from $95 to $480 per year.

If a monitored system suits your needs, you’ll also get a break on your home insurance. Most companies will discount your annual rate 15% to 20% if you have a security service.

Home security systems also make your home more marketable: 50% of homebuyers (in the NAHB survey) say a home security system — particularly security cameras — tops their list of most-wanted technology features.

You can go over the top and install high-tech security gadgets, like smartphone-operated locks and a laser trip wire. Or you can keep it simple with a keypad that communicates with sensors and motion detectors throughout your house.

Tips:
  • If you do decide to go with a monitoring system, choose a company with a 10-year track record to ensure reliability.
  • Don’t rely on any system as your sole means of security. Locking doors and windows is still your best first-line of defense.


6.  Do Almost Any Energy-Efficient Upgrade

The value of energy-efficient houses just keeps going up and up. A UCLA study examined the sales prices of 1.6 million California homes from 2007 to 2012 and found that homes with Energy Star or LEED certification had, on average, a 9% higher price.

That finding is echoed in NAHB’s report that surveyed homebuyers across the nation: Nine out of 10 potential buyers would select an efficient home with lower utility bills over a less efficient home priced 2% to 3% less.

One energy-saving home improvement project that not only saves energy but gives you tons of enjoyment, too, is converting a wood-burning fireplace into a gas one. If you like to crunch energy numbers, gas fireplaces have energy-efficient ratings as high as 77%, compared with wood-burning fireplaces that convert only 15% of wood’s energy into useful heat.

In fact, 39% of homebuyers say a gas fireplace is an essential or desirable feature of the next home they purchase. So when it comes time to sell your home, more than one-third of potential buyers will be looking for a gas fireplace.

In the meantime, it’ll be paying for itself in reduced heating costs.

Some tips for converting to gas:
  • A direct-vent gas insert most closely replicates the wood-burning experience at a cost of about $3,000 to $4,000, installed.
  • If you don’t have an existing fireplace, you can install a direct-vent (vents directly outside so you don’t need a chimney) gas fireplace for about $5,000 (installed and finished).

7.  Add Some Creative Storage

We don’t have to sell you on the value of storage and built-in organization. Since when have you heard someone complain about too much storage? Never, we bet.

Adding storage is a no-brainer, but it does take a little brainpower to find your home’s hidden storage.

Here are a few ways to think outside of the toy box:
  • Open drywall to create storage cubbies between your wall’s studs. See how.
  • Install platform storage that hangs from your garage ceiling.
  • Even stairs can give you more storage. One clever mom repurposed an old chest of drawers and created storage within a basement staircase. See how she did it.


8.  Light Up the Outdoors

Exterior lighting makes your home shine in the evening, accents features you like most about your house, and helps keep burglars away. A hard-wired lighting fixture can cost $150 to $250 to install. On the plus side, you could get a 50% return on your investment, says Judith Patriski, a Cleveland appraiser and REALTOR®. Installing motion-detecting lights can even lower some homeowners’ insurance premiums. (Check with your agent.)

And with technological advances in solar lighting, it’s easier and more cost-effective than ever to boost your home’s nighttime curb appeal.

Plus, 90% of buyers say outdoor lighting is on their list of desired home features.

Tips:
  • Place accent lights under your favorite trees to show off your landscaping’s top earners.
  • If your lights are hard-wired, put them on a timer so you don’t waste energy running them during the day.
  • Choose a warm white light. It’ll make your home look and feel welcoming.


Contact me today for a Free Home Value Report!

Wednesday, September 2, 2015

Waterloo Region Home Sales Continue to be Strong Through August

Contact me today to find out what your home is worth!

With a total of 459 residential property sales through the Multiple Listing System (MLS®) of the Kitchener-Waterloo Association of REALTORS®, the month of August posted a 2.1% decrease in home sales compared to the same month last year across Kitchener-Waterloo and area.

However, home sales in the month of August were 9.5% percent above the 5-year average for the month. This strong sales activity helped bring year-to-date total sales to 3,991, a 6.1% increase compared to the same time last year, and 6% above the 5-year average. Year-to-date sales were also the highest on record since 2008.

There was strong residential sale activity this summer season and with recording setting year-to-date sales it’s clear that buyers remain confident about the value of homes in Kitchener-Waterloo and area.  Overall, the Kitchener-Waterloo real estate sector continues to show long-term strength and stability.

Residential sales in August included 284 single detached homes (down 2.1% from last year), 35 semi-detached (up 2.9%), 29 townhomes (down 17.1%) and 107 condominium units (down 0.9%).
The average sale price of all residential sales through the KWAR’s MLS® System increased 6.6% percent last month to $347,057 compared to August 2014. Single detached homes sold for an average price of $401,533 an increase of 6.2% percent compared to last year. The average sale price for a condominium was $241,508, an increase of 7.7% percent and the average sale price for a freehold townhome was $300,546, an increase of 2.9% percent from the same time last year.